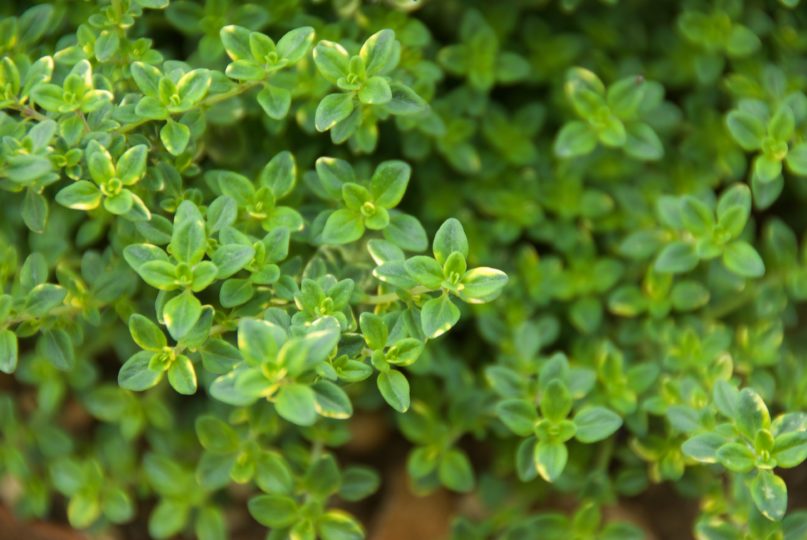
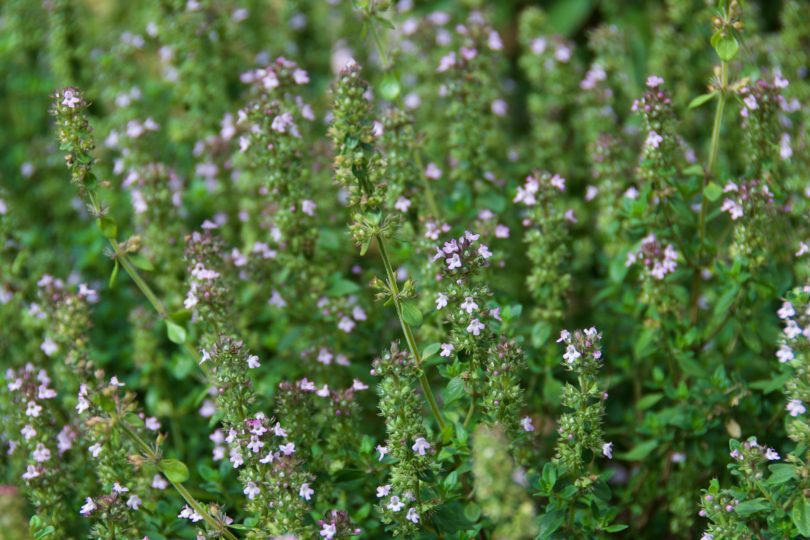
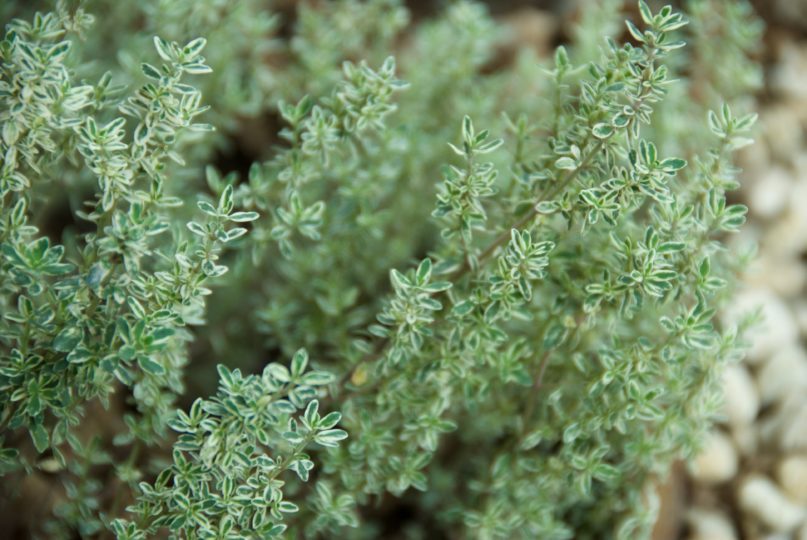
They stand upright, mound or creep. Thymus vulgaris, longstanding winner of the ‘smallest evergreen shrub in the garden’ contest, is a plant I wouldn’t do without. Not one for the herbaceous borders as it’s diminutive size is easily swamped, but ideal for the terrace, terracotta pot, dry garden or as in our case, the herb garden. Seemingly inconspicuous, yet packed with scent, nutritional benefits and incredible flavour. Thyme is a lovely plant for the gardener, pollinator and, basically anyone with a kitchen.
An easy plant to grow, but anything too wet and thymes will sulk. Full sun, well-drained, poor soil is ideal. When in doubt add grit on planting and for pots, opt for soil-based substrate as opposed to compost. They really only need minor watering until established, apart from that pretty drought friendly. As for maintenance, a little pruning after flowering in late summer to prevent them becoming woody, is pretty much it. So all in all, an easy plant to look after.
Packed to the rafters with antioxidant phytonutrients, just a pinch of dried or fresh thyme can quadruple the level of antioxidants of any meal [1]. This incredible little plant is an excellent source of vitamin C, vitamin A, fiber, riboflavin, iron, copper, and manganese, calcium and manganese, B6, folate, phosphorus, potassium, and zinc. Potent little antioxidant powerhouse therefore, which not only adds flavour but has 10 times the antioxidant power of nuts and seeds. Time to pull that thyme pot a tad closer to the kitchen door, me thinks…
Recommended cultivars
There are hundreds of varieties of thyme to choose from, as they hybridise easily. Culinary thymes tend to be of the upright varieties as they are easier to harvest. Though in fairness, even the uprights are pretty small and bending down a millimetre further to pick at a creeping thyme isn’t that much more of an effort. Good culinary varieties include; Thymus vulgaris (French), Thymus ‘Fragrantissimus’, Thymus vulgaris ‘compactus’, Thymus ‘Peter Davis’. Though of all, my favourites for the kitchen are the lemon thymes, including; Thymus x citriodorus ‘Silver Queen’, Thymus citriodorus, Thymus x citriodorus variegatus (all uprights) and Thymus serphyllum Lemon Curd (creeper).
Thyme plants are generally available from your local garden centres. For the refined enthusiast, I’d head to the herb specialists such as Jekka McVicar, Norfolk Herbs, or if you’re an Oxfordshire local, the National Herb Centre near Banbury.
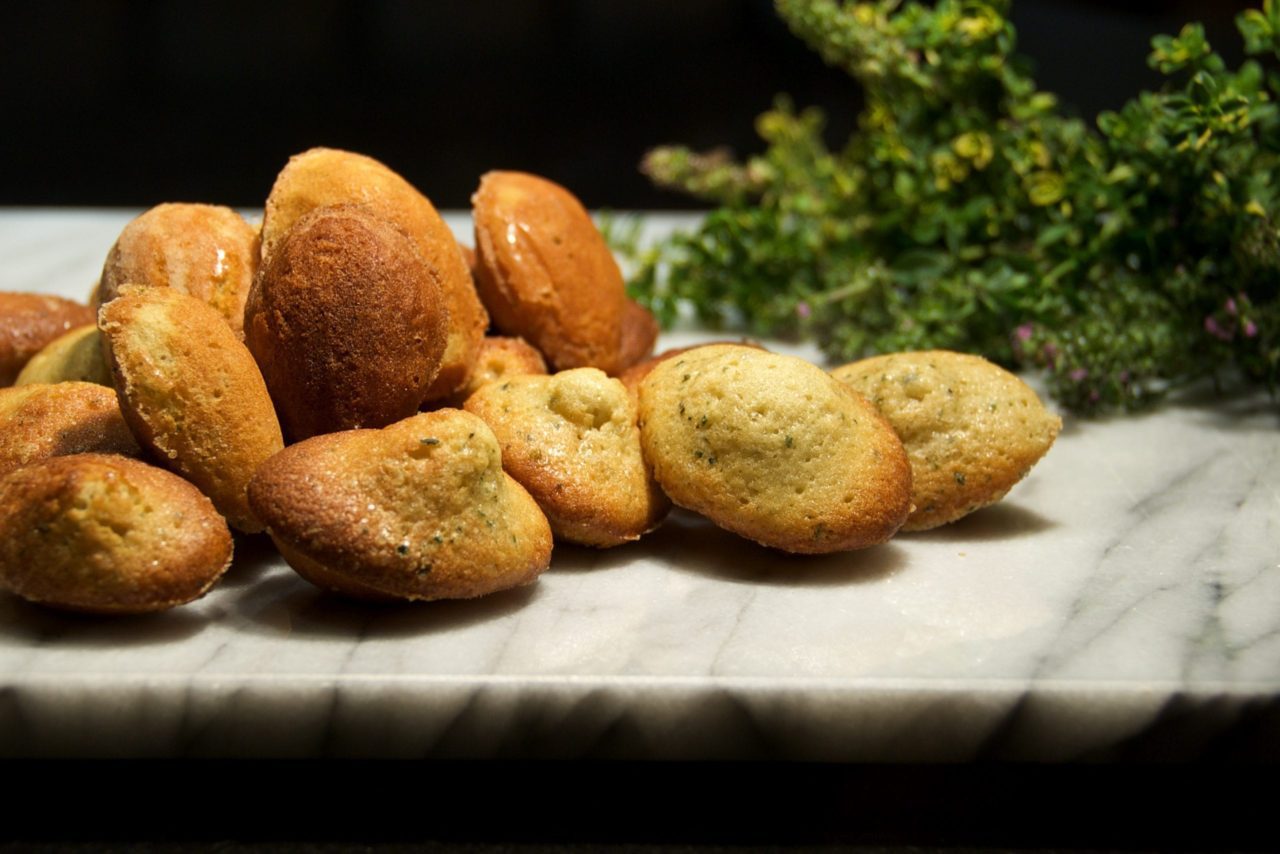
Madeleines
Once unbelievably, as welcome as an estate agent handing out a business card at a funeral, now a firm cake trolley favourite. Yes, admittedly I used to disregard the Madeleine as squat French cupcake, which is in the words of my guru Blackadder is of course ‘madder than MadJack McMad, winner of the Madman competition‘.
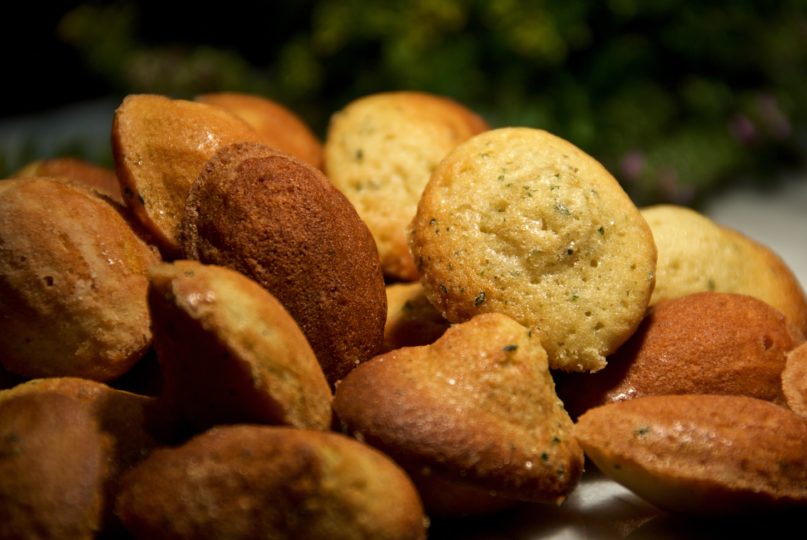
Cakes they are indeed, but Madeleines are the lightest, buttery, fluffiest of things that deserve so much more credit than I ever bestowed on them. Better still, with a delicate infusion of lemon thyme from the herb garden, this is a recipe to behold, treasure and pass on for generations. If I say so myself…
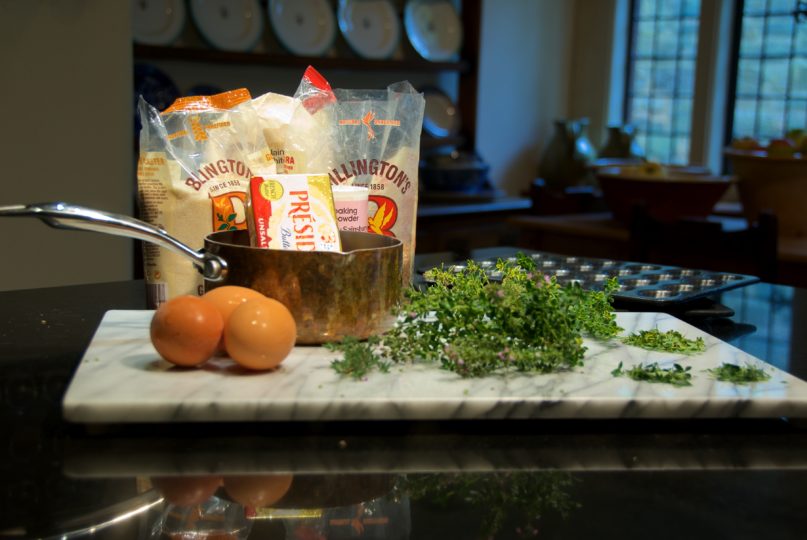
Ingredients
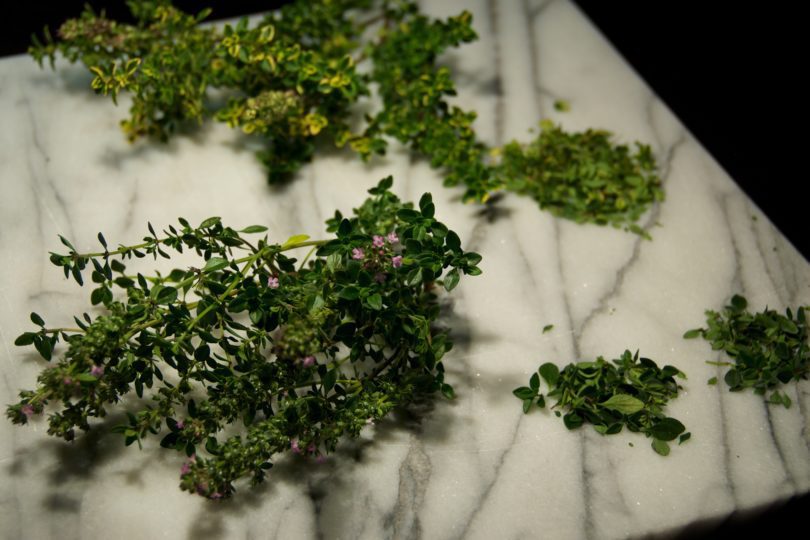
- 3tsp lemon thyme leaves
- 100g unsalted butter
- 2 eggs
- 50g caster sugar
- 25g demerara sugar
- 2tsp runny honey
- 100g plain flour
- 1/2tsp baking powder
- 1/4tsp salt
Before we start, a few Madeleine house rules;
Yes. You need to brown the butter. Takes no time, but oh my goodness it’s worth the very minor extra effort. To ensure the lemon thyme is not overpowered, brown the butter to a rich gold. No further.
Yes. You do need a madeleine mould, otherwise they’re just another squat cake and you know how I feel about those. The scallop shell ensures that special bake, size and shape. I also prefer the ye oldie metal version as opposed to squidgy silicone ones but that’s personal choice. I’m currently trialling the mini madeleines moulds, which are proving popular.
Yes. This recipe has a little less sugar than most, but I prefer them a little less sickly sweet. Prevents biliousness if you eat them in bulk which is a bonus. Plus as I like to coat them with a little extra demerara for added texture, that makes up sugar levels.
Yes. You need to ‘rest’ the batter in the fridge for at least an hour. Can be kept in the fridge for up to 12 hours, though some say you can even rest it for 2 days. Resting the batter theoretically ensures a healthy bump when baking. Though, resting is also terribly useful as it means you can have them ready to bake in the fridge for a delightful dessert, or simply served hot from the oven for a special tea or coffee. Genius.
And yes. If you follow the method stipulated, your madeleines will reward you with their oh so sought after ‘bumps’, which like ‘feet’ for macarons, are the holy grail to achieve.

Method
- Melt the butter in a pan over medium heat. Watch carefully, bring to the boil and allow to simmer until it begins to turn to a rich gold. Take off the heat immediately. Purists can decant into a cool bowl. Put aside.
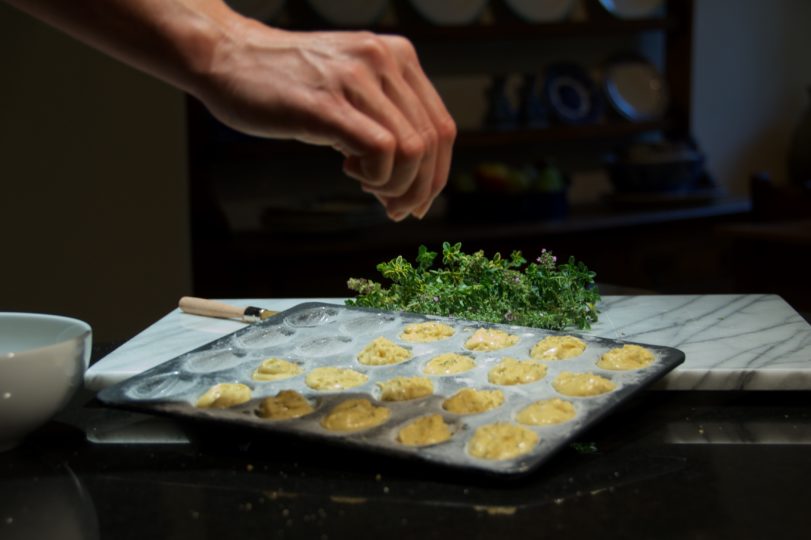
- At this stage, butter your mould with some of the melted butter carefully making sure you coat the individual scallops well. Flour the tray and tap to remove the excess. Place the tray in the fridge. Yes, the fridge. You want the moulds cool.
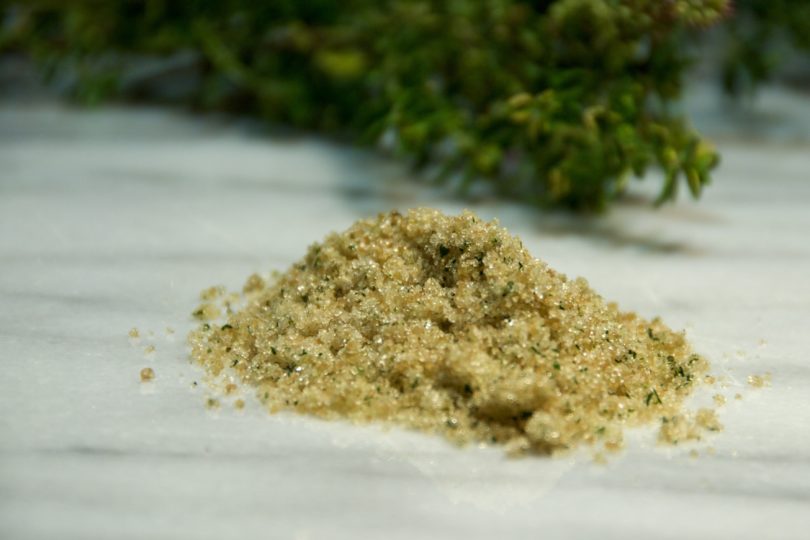
- Place the thyme leaves and sugars in the food processor and whizz to smithereens. The leaves should be completely incorporated as will the delicious scent. Scoop out 2 tbsps and place aside.
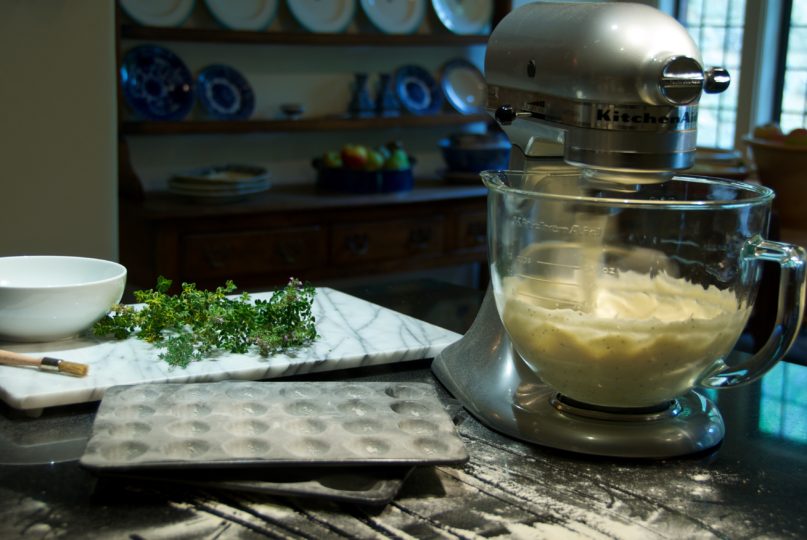
- Whisk the eggs with the remaining lemon thyme scented sugars and salt until lightened and voluminous. Beat in the honey, followed carefully by the cooled butter.
- Sieve the flour and whisk in the baking powder. Gently fold flour into the egg & butter mixture. Cover with cling film (direct onto the batter) and chill for at least an hour.
- Fill your madeleine moulds to just under the level of your moulds. It’s important not to overfill them. The mixture will spread and grow and you must keep the shape or they’re just no good. Chill the mixture in the fridge again for another hour.
- Set your oven at for 180C. Place a baking tray in the oven to get nice’n toasty, onto which you will place your madeleine mould for added heat.
- When ready to bake, retrieve your 2 tablespoons of lemon thyme scented sugars from step 3, and gently sprinkle over the individual moulds to coat the batter.
- Bake for about 10 minutes, but watch them as they may need a few minutes more or less. Once they’re looking golden they will be ready. Allow to cool for a minute or so, then decant. For any naughty stickers, use a knife to gently to loosen them from the tin.
- Delicious eaten warm, or cooled. Up to you. Ours have a short lifespan so I’m really unable to convey how they taste when cooled or how long they keep. I have it on good authority that the honey will keep them moist, stored in airtight container. You can serve as they are or sprinkled with little icing sugar.
Eh voila. Simply delicious and on account of all those antioxidant properties, ever so healthy. Despite the butter. The calories. Oh and the sugar….
Bon appetit!
Footnotes
- Michael Greger M.D. FACLM, Antioxidants in a Pinch: Dried Herbs and Spices, 6th of September 2012